 Sign in to Mod The Sims
 (By Request) Fence Urinals
 (By Request) Fence Urinals
MTS has all free content, all the time. Donate to help keep it running.
SCREENSHOTS
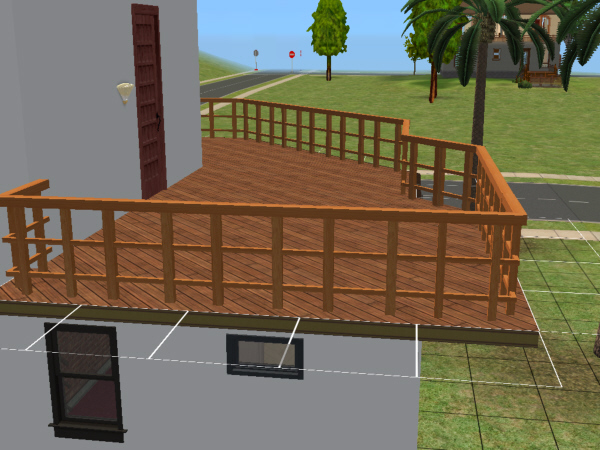
deck.jpg - width=600 height=450
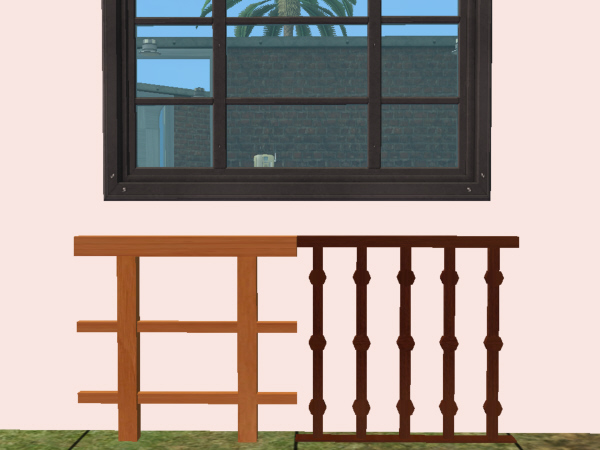
default and dark.jpg - width=600 height=450
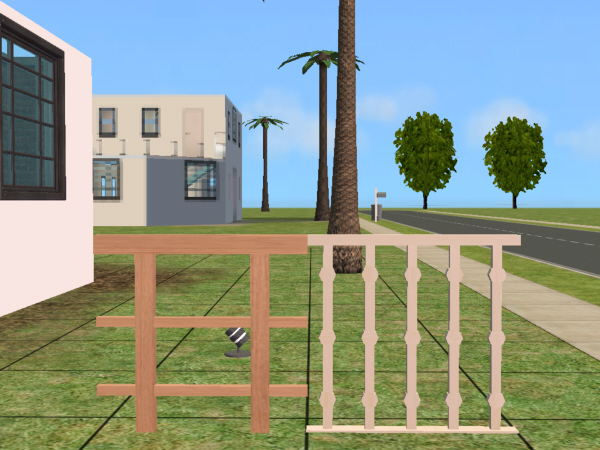
light and white.jpg - width=600 height=450
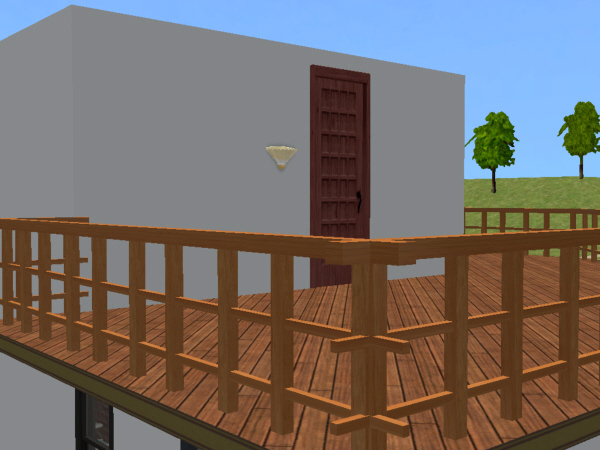
alt corner.jpg - width=600 height=450
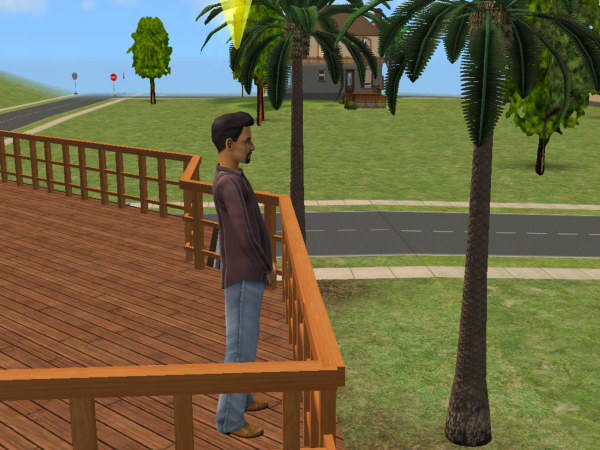
in use.jpg - width=600 height=450
There are two different sets in this thread. The "Open-Air Deck Urinal" is the one posted below. The "Open-Air Balcony Urinal" I will place in the post #2, just to keep the two sets separate. Most (if not all) of the following information applies to both sets.
This was requested here... http://www.modthesims2.com/showthre...ighlight=urinal
NOTE: Maxis Cheat Codes may be needed to place some of these objects. Read "Placement" for information.
Please read this post as it may contain important and/or useful information. And if you like these sets please give "Thanks".
My 3rd and 4th objects I decided to place in the same thread since they are the same thing except different meshes (they are also my first time fullfilling a request). Here we have some urinals once again. But this time they aren't just normal urinals but instead, FENCE URINALS!!!
There are three objects in the set(s).
1) Front Section - This is the only interactive section to the set. This is the main object and is the one that has all the recolorings. You need this object in your game for the two other sections (corner, diagonal) to have any additional recolors. Also, this is the only piece you will need to make a recolor for. It will automatically be applied to the other two sections.
2) Corner Section - This section is not interactive. It is purely decorative and is provided so you can make a complete deck/balcony. (read "Architecture's Preference" for optional corner idea.)
3) Diagonal Section - This section is not interactive. It is purely decorative and is provided so you can make a complete deck/balcony. This section is also mainly targeted at those who do not own University but technically, anyone can use it. (read "Placement" for more information.) (read "Architecture's Preference" for optional diagonal idea.)
PLACEMENT:
1) Front Section - No cheat codes are required for normal placement of this section. (read "Architecture's Preference" for additional diagonal/corner idea.)
2) Corner Section - No cheat codes are required for normal placement of this section.
3) Diagonal Section - This section was made mainly for those who do not own University. Why? In University you are given a new cheat code for 45 degree angled objects. If you don't have University then you can't use the cheat. Hence why I made this section. You still need to use cheat codes for placement of this section, but they are normal TS2 cheat codes. Turn on (TS2) cheats moveobjects on/off and boolProp snapObjectsToGrid true/false to line up this section with the sections next to it.
"Architecture's Preference"
1) Additional Corner idea - Instead of using the corner section, you can use two "front" sections. This will give you corners that sims can interact with. It also provides (using the "Deck" set) a more interesting looking corner by giving a "peg" effect. I personally think this option would be nice on rustic buildings like log cabins. (see pic 4 to see this effect.) This requires the (TS2) cheat moveobjects on/off .
2) Additional Corner idea - Instead of using the diagonal section, you can use a "front" section. This will give you a diagonal sims can interact with. This requires the (TS2) cheat code boolProp snapObjectsToGrid true/false and the (TS2U) cheat code boolProp allow45DegreeAngleOfRotation true/false .
OPTIONAL RECOLORINGS:
Both sets carry the same texture recolors. The Default is a middle tone ranged wood texture (shown on the object to the left in pic 2)
The optional recolorings are...
1) Dark wood (shown on the right in pic 2)
2) Light wood (shown on the left in pic 3)
3) White/white-washed (show on the right in pic 3)
ADDITIONAL INFORMATION:
1) The "flushing effect" and flushing noise will not play.
2) You can place these objects on floors and terrain.
3) The sets are availible on both Community and Residental Lots.
4) Besides improving the bladder motive, these sets will also raise your sim's "fun" motive while they pee. It will stop raising once they finish peeing. I gave it a fun rating of 9 since that was the object's rating where I found the info/numbers on. So it should raise your sim's motives at the same rate an object with a fun rating of 9 would. Note: The longer your sims pee, the more fun they have.
5) And again, just like my past urinals, recolors will not revert, autonomous is functioning, and shooing is disabled.
Rules of Usage:
Recoloring: You may recolor this set as long as the following applies: (Note: you only need to recolor the "front" object in the set.
1) You agree NOT to place the recolorings on any free/pay or pay sites. You can only place them on FREE sites. (I would prefer if they were at MTS2 so the mesh and recolorings are on the same site, but I won't limit you to just this site.)
Mesh: Do not redistribute the meshes on any other site.
Lots/House: Due to the nature of these sets, please do not use them in houses/lots you are planning to upload.
Tech Stuff:
Deck Front: FaceCount = 60 VertexCount = 120
Deck Diagonal: FaceCount = 60 VertexCount = 120
Deck Corner: FaceCount = 120 VertexCount = 240
Balcony Front: FaceCount = 564 VertexCount = 918
Balcony Diagonal: FaceCount = 564 VertexCount = 918
Balcony Corner: FaceCount = 1128 VertexCount = 1845
Pictures: The "Deck Urinal" is the object that is mostly shown in the pictures and is the object on the left in the "recolor" photos (pics 2 and 3). The "Balcony Urinal" is the object shown on the right in the "recolor" photos (pics 2 and 3).
This is a new mesh, and means that it's a brand new self contained object that usually does not require a specific Pack (although this is possible depending on the type). It may have Recolours hosted on MTS - check below for more information.
| Filename | Size | Downloads | Date | |||||
|
Hunter240x - Deck Urinal (front) - RECOLOR - White.rar
Size: 22.3 KB · Downloads: 1,027 · 10th Jan 2006 |
22.3 KB | 1,027 | 10th Jan 2006 | |||||
|
Hunter240x - Deck Urinal (front) - RECOLOR - Light.rar
Size: 29.0 KB · Downloads: 1,059 · 10th Jan 2006 |
29.0 KB | 1,059 | 10th Jan 2006 | |||||
|
Hunter240x - Deck Urinal (front) - RECOLOR - Dark.rar
Size: 27.8 KB · Downloads: 1,084 · 10th Jan 2006 |
27.8 KB | 1,084 | 10th Jan 2006 | |||||
|
Hunter240x - Deck Urinal (diagonal) - MESH.rar
Size: 21.1 KB · Downloads: 1,102 · 10th Jan 2006 |
21.1 KB | 1,102 | 10th Jan 2006 | |||||
|
Hunter240x - Deck Urinal (corner) - MESH.rar
Size: 21.4 KB · Downloads: 1,131 · 10th Jan 2006 |
21.4 KB | 1,131 | 10th Jan 2006 | |||||
|
Hunter240x - Deck Urinal (front) - MESH.rar
Size: 81.6 KB · Downloads: 1,345 · 10th Jan 2006 |
81.6 KB | 1,345 | 10th Jan 2006 | |||||
| For a detailed look at individual files, see the Information tab. | ||||||||
Key:
- - File was updated after upload was posted
Install Instructions
Basic Download and Install Instructions:
1. Download: Click the download link to save the .rar or .zip file(s) to your computer.
2. Extract the zip, rar, or 7z file.
3. Place in Downloads Folder: Cut and paste the .package file(s) into your Downloads folder:
1. Download: Click the download link to save the .rar or .zip file(s) to your computer.
2. Extract the zip, rar, or 7z file.
3. Place in Downloads Folder: Cut and paste the .package file(s) into your Downloads folder:
- Origin (Ultimate Collection): Users\(Current User Account)\Documents\EA Games\The Sims™ 2 Ultimate Collection\Downloads\
- Non-Origin, Windows Vista/7/8/10: Users\(Current User Account)\Documents\EA Games\The Sims 2\Downloads\
- Non-Origin, Windows XP: Documents and Settings\(Current User Account)\My Documents\EA Games\The Sims 2\Downloads\
- Mac: Users\(Current User Account)\Documents\EA Games\The Sims 2\Downloads
- Mac x64: /Library/Containers/com.aspyr.sims2.appstore/Data/Library/Application Support/Aspyr/The Sims 2/Downloads
- For a full, complete guide to downloading complete with pictures and more information, see: Game Help: Downloading for Fracking Idiots.
- Custom content not showing up in the game? See: Game Help: Getting Custom Content to Show Up.
- If you don't have a Downloads folder, just make one. See instructions at: Game Help: No Downloads Folder.
Also Thanked - Users who thanked this download also thanked:
Packs Needed
Packs Needed
| Base Game | |
|---|---|
 | Sims 2 |
| Expansion Pack | |
|---|---|
 | Nightlife |
More Downloads BETA
Here are some more of my downloads: