 Sign in to Mod The Sims
 Pretty Pony Panda
 Pretty Pony Panda
MTS has all free content, all the time. Donate to help keep it running.
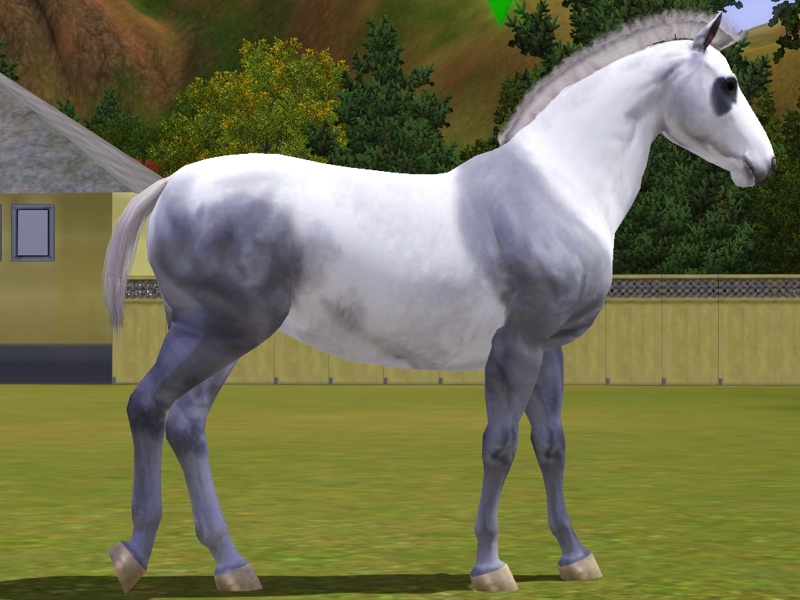
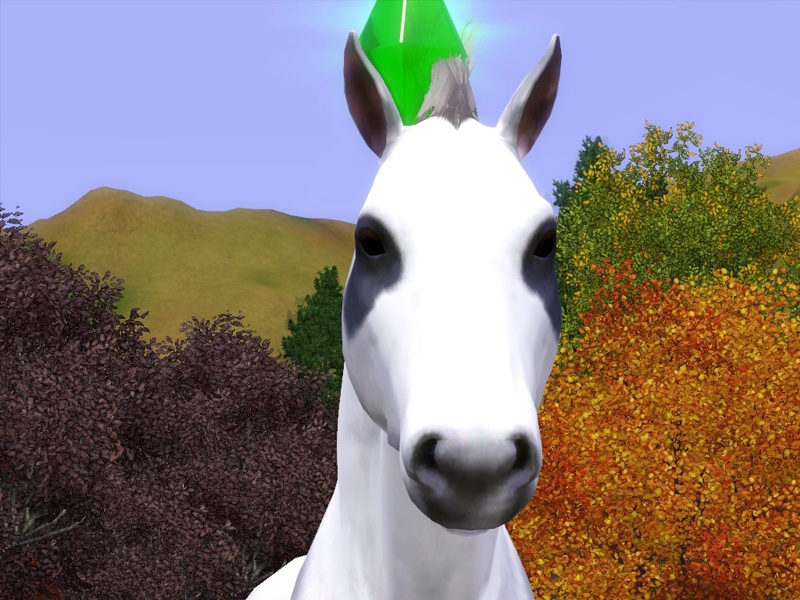
SCREENSHOTS
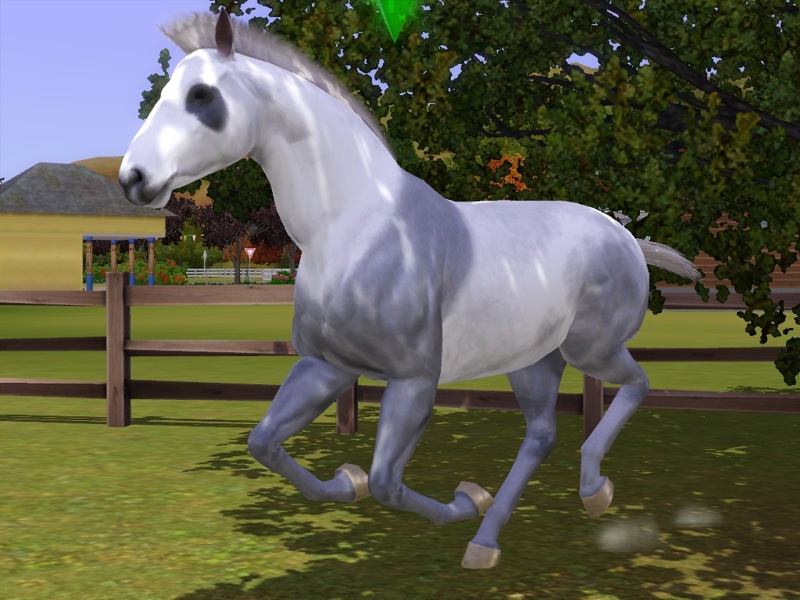

horsepan_body.jpg - width=800 height=600
horsepan_body2.jpg - width=800 height=600
horsepan_collage.jpg - width=800 height=768
horsepan_head.jpg - width=800 height=600
Originally I was not going to do markings for the horses. However, I had a compulsion to 'complete the set' so to speak. However, I did sit on my thumbs and procrastinate a fair amount before finally sitting down and whipping this together.
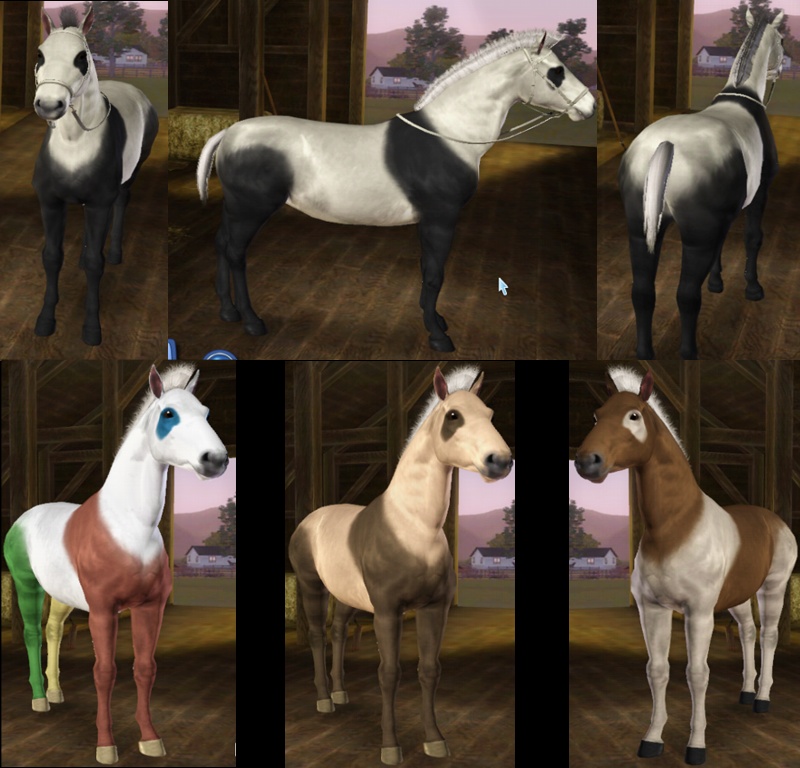
I did things a little differently with this set. First off, the eye-patches stand alone. They don't also include ear patches. There are no ear patches. It just looked wrong when I tried to make them. Second, the RegionsAll Panda marking is only the front area, whereas I separately made really tall socks for the rear quarters. Right and left rear legs are independent as you can see from that gaudy colourful horse, but are packaged together.
All markings were thrown together into one zip. If you want to be selective about which parts you want, then just don't unzip the ones you don't want, or delete them after.
Just so you know...
Tachy_ahRegionsHead_panda is the file name for the eye patches.
Tachy_ahRegionsAll_panda is the file name for the front legs/shoulder/chest area.
Tachy_ahRegionsLegs_panda is the file name for the rear leg socks.
Right then! Consider this project completed! And I must say, for a first project it turned out better than I thought, but not as nice as I would like.
Now you, too, can make custom regional markings, for I have written up a Tutorial that can be found in the MTS forums.
By the way, at this point, I don't care what you do with this custom content so long as you don't use it to make money.... well unless you cut me in on it.
So no using it as premium or pay content on pay sites.
Anything else goes.
In fact, I would love it if you showed me screenshots of your use of my custom content.
Additional Credits:
CmarNYC for helping me figure out important stuff
Maxis for making The Sims 3
People who shall remain nameless but know who they are for bugging me to finish the set.
| Filename | Size | Downloads | Date | |||||
|
Tachy_HorsePandaPack.zip
Size: 234.8 KB · Downloads: 1,034 · 7th Mar 2012 |
234.8 KB | 1,034 | 7th Mar 2012 | |||||
| For a detailed look at individual files, see the Information tab. | ||||||||
Key:
- - File was updated after upload was posted
Install Instructions
Quick Guide:
1. Click the file listed on the Files tab to download the file to your computer.
2. Extract the zip, rar, or 7z file. Now you will have either a .package or a .sims3pack file.
For Package files:
1. Cut and paste the file into your Documents\Electronic Arts\The Sims 3\Mods\Packages folder. If you do not already have this folder, you should read the full guide to Package files first: Sims 3:Installing Package Fileswiki, so you can make sure your game is fully patched and you have the correct Resource.cfg file.
2. Run the game, and find your content where the creator said it would be (build mode, buy mode, Create-a-Sim, etc.).
For Sims3Pack files:
1. Cut and paste it into your Documents\Electronic Arts\The Sims 3\Downloads folder. If you do not have this folder yet, it is recommended that you open the game and then close it again so that this folder will be automatically created. Then you can place the .sims3pack into your Downloads folder.
2. Load the game's Launcher, and click on the Downloads tab. Find the item in the list and tick the box beside it. Then press the Install button below the list.
3. Wait for the installer to load, and it will install the content to the game. You will get a message letting you know when it's done.
4. Run the game, and find your content where the creator said it would be (build mode, buy mode, Create-a-Sim, etc.).
Extracting from RAR, ZIP, or 7z: You will need a special program for this. For Windows, we recommend 7-Zip and for Mac OSX, we recommend Keka. Both are free and safe to use.
Need more help?
If you need more info, see:
- For package files: Sims 3:Installing Package Fileswiki
- For Sims3pack files: Game Help:Installing TS3 Packswiki
Recommended
The creator also recommends the following uploads:
Check out the rest of the set:Tutorial: Regional Markings
Also Thanked - Users who thanked this download also thanked:
Packs Needed
Tags
#Horse, #Horses, #Create-a-pet, #Panda, #Regions, #Regional Markings, #markings, #Eye-patch, #patches, #socks
Packs Needed
| Base Game | |
|---|---|
 | Sims 3 |
| Expansion Pack | |
|---|---|
 | Pets |
About Me
I'm all about sharing. Actually, I'm not that good at sharing. It's all mine! MINE MINE MINE! Which is why it is so strange that my policy is do whatever the heck you want to custom content I create and upload here. I don't mind if you feature it in screenshots, make a sim/pet with my content and upload it, all I want is credit, or at least you saying you didn't create if you forgot who the heck I am. Oh, well I would get annoyed if you used it one a paid site because I'm not getting anything for this, neither should you. So neiner neiner.